TIP
Slidev:程序员的 PPT 神器
做视频,最好的演示工具莫过于 PPT 了。对于写惯了代码的程序员来说,点来点去做出一个好看且漂亮的 PPT 未免有些复杂了。
所幸有这么一个工具,它可以使用简单的 markdown 语法编写 PPT 内容,支持在markdown 中使用 html ;可以使用 CSS(unocss) 设置图片、文字位置、大小、动画;可以使用 vue(JavaScript、vueuse)等自定义各种功能,让你的 PPT 充满无限可能。
也就是说可以直接使用前端技术定制自己的 PPT,在编写的 markdown 文本内可以一目了然的看到字体的大小、颜色、样式,修改的时候非常方便。
快速上手
提示:在使用之前需要提前了解 markdown、HTML、CSS、Vue 等工具
可以进入官网:https://sli.dev/ 查看介绍,如果对英文不熟悉的可以跳转到中文官网(中文官网没有英文介绍齐全)。
创建项目
npm create slidev然后输入项目名,我给 slidev-tutorial 。创建好了之后默认会在浏览器直接打开演示内容,我建议是关掉命令行,重新使用 IDE 打开,方便进行学习调试。
这里我选择 Pycharm 进行打开,然后运行 npm run dev 启动并访问 http://localhost:3030/ 就可以看到效果了。需要注意的是,默认 slidev 等价于 slidev slides.md ,可以使用 slides 指令打开其他的 markdown 文件。
第一张 PPT
先介绍一下 PPT 主题的设置
---
theme: seriph
background: https://source.unsplash.com/collection/94734566/1920x1080
class: text-center
highlighter: shiki
lineNumbers: false
info: |
  ## Slidev Starter Template
  Presentation slides for developers.

  Learn more at [Sli.dev](https://sli.dev)
drawings:
  persist: false
transition: slide-left
title: Welcome to Slidev
mdc: true
---- theme:背景主题
- background:背景图片
- class: text-center 文字居中显示,来自 unocss 的技术支持
- highlighter: 代码高亮的插件
- lineNumbers:代码是否显示行号
- info:不清楚干嘛,不影响
- drawings:暂时不清楚作用
- transition:动画过度效果
- title:html 的 title
- mdc:markdown component 的支持,默认开启
然后是第一张 PPT 的设置
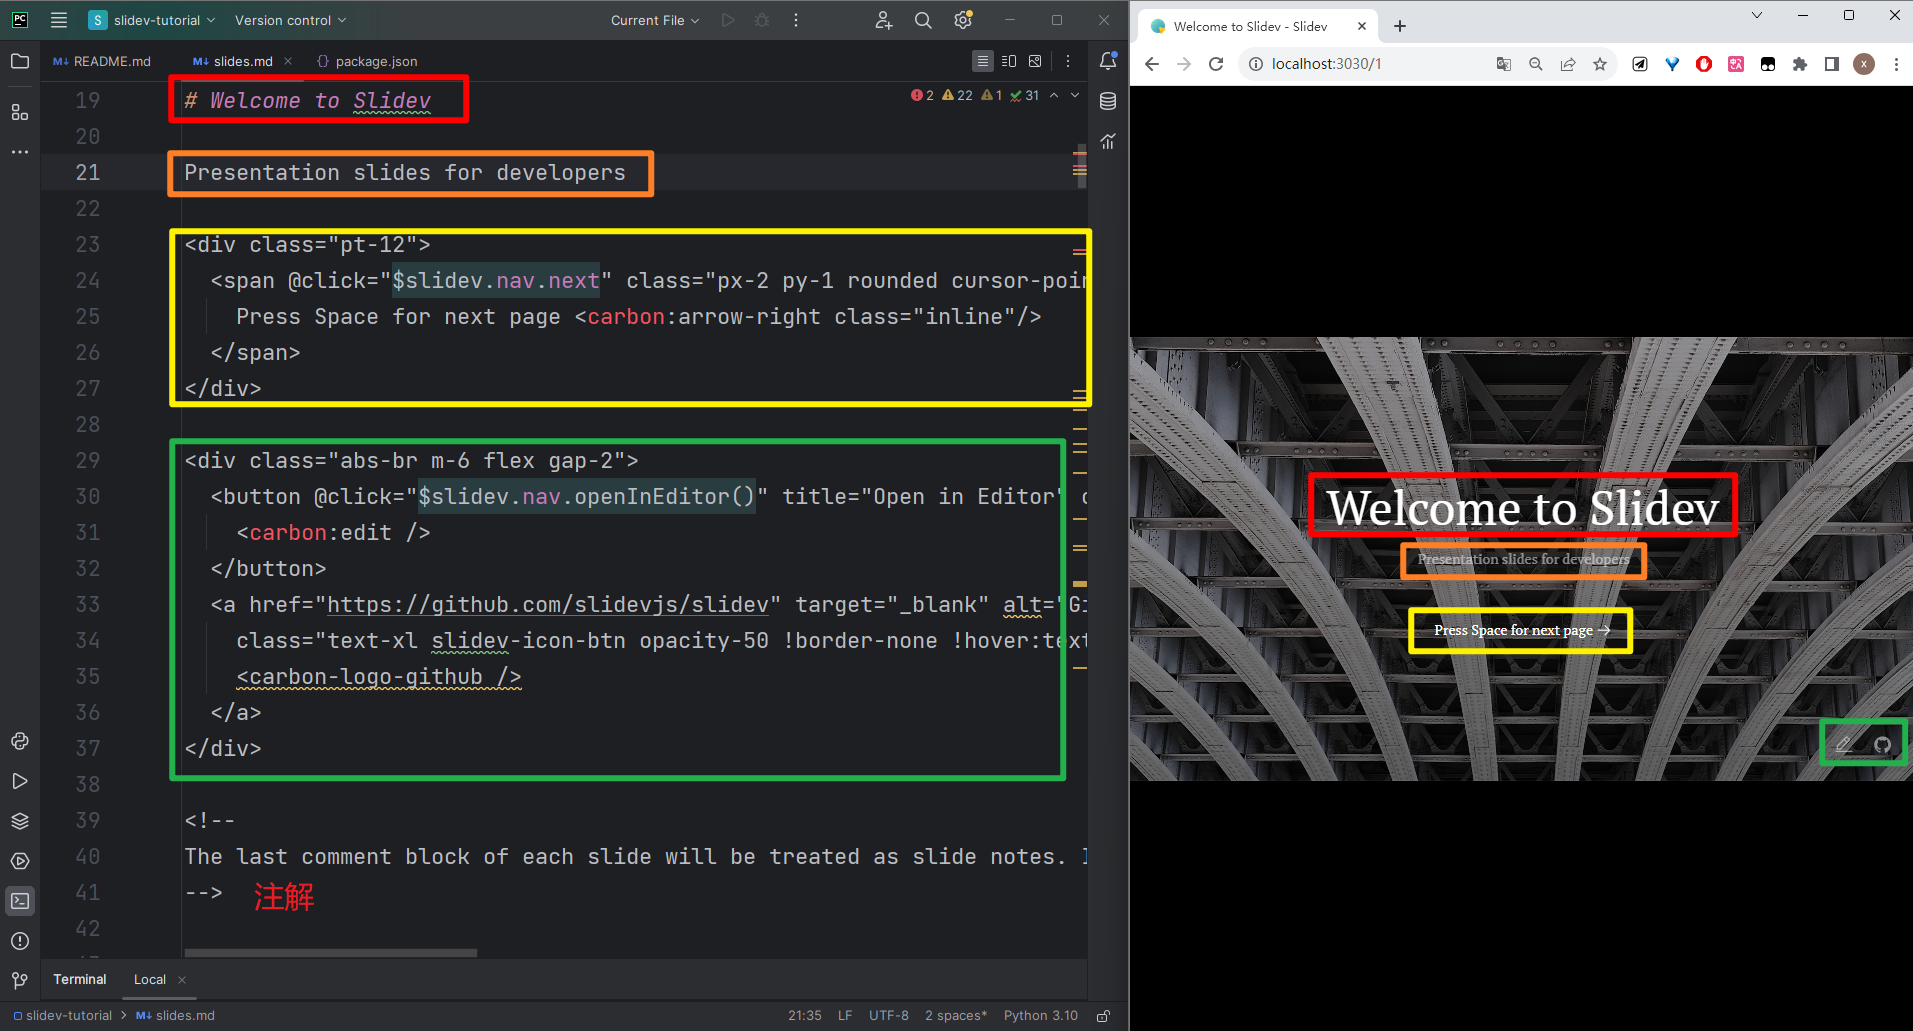
代码如下
# Welcome to Slidev

Presentation slides for developers

<div class="pt-12">
  <span @click="$slidev.nav.next" class="px-2 py-1 rounded cursor-pointer" hover="bg-white bg-opacity-10">
    Press Space for next page <carbon:arrow-right class="inline"/>
  </span>
</div>

<div class="abs-br m-6 flex gap-2">
  <button @click="$slidev.nav.openInEditor()" title="Open in Editor" class="text-xl slidev-icon-btn opacity-50 !border-none !hover:text-white">
    <carbon:edit />
  </button>
  <a href="https://github.com/slidevjs/slidev" target="_blank" alt="GitHub" title="Open in GitHub"
    class="text-xl slidev-icon-btn opacity-50 !border-none !hover:text-white">
    <carbon-logo-github />
  </a>
</div>

<!--
The last comment block of each slide will be treated as slide notes. It will be visible and editable in Presenter Mode along with the slide. [Read more in the docs](https://sli.dev/guide/syntax.html#notes)
-->
第二张
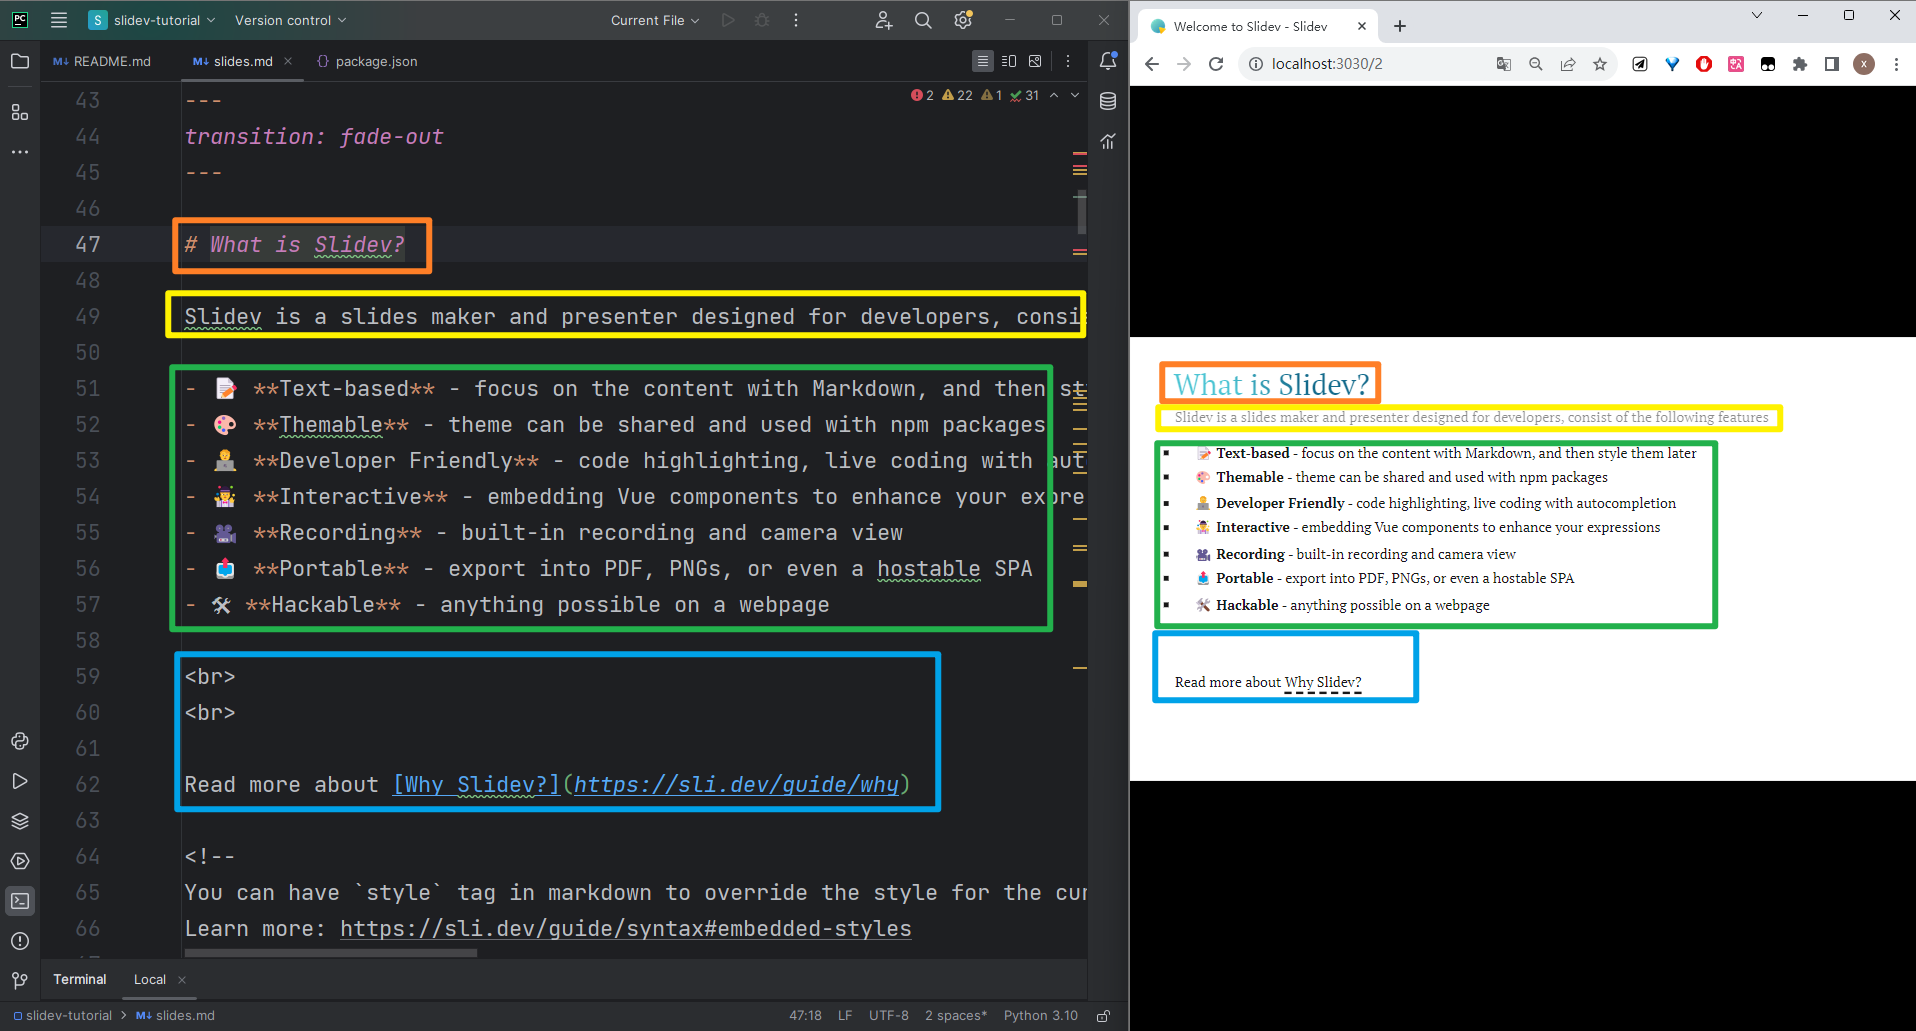
使用 --- 表示开始一张新的 PPT,如果要给新的 PPT 新增过度动画,可以写成下面这种方式。
---
transition: fade-out
---
第二张的标题部分使用了渐变色,原因是在第二张 PPT 下方添加了渐变色的样式
<style>
    h1 {
        background-color: #2B90B6;
        background-image: linear-gradient(45deg, #4EC5D4 10%, #146b8c 20%);
        background-size: 100%;
        -webkit-background-clip: text;
        -moz-background-clip: text;
        -webkit-text-fill-color: transparent;
        -moz-text-fill-color: transparent;
    }
</style>
第三张
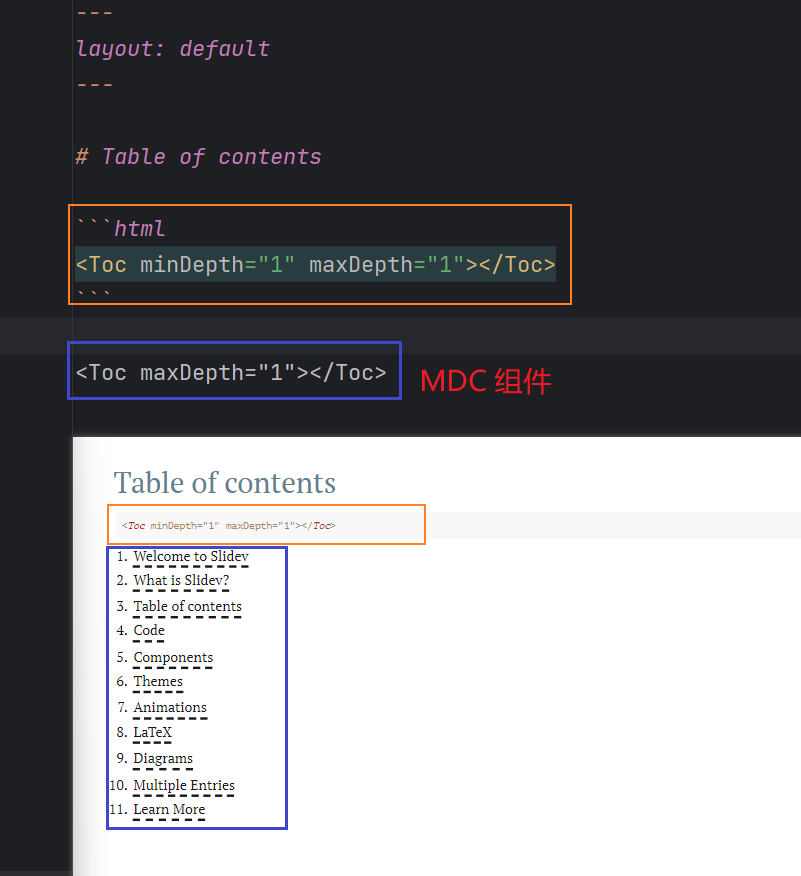
第三张使用了 MDC 组件,点击之后还可以跳转到指定的页,这个是 slidev 里面默认提供的。
第四张
后面的开始直接贴图片与 markdown 进行讲解。
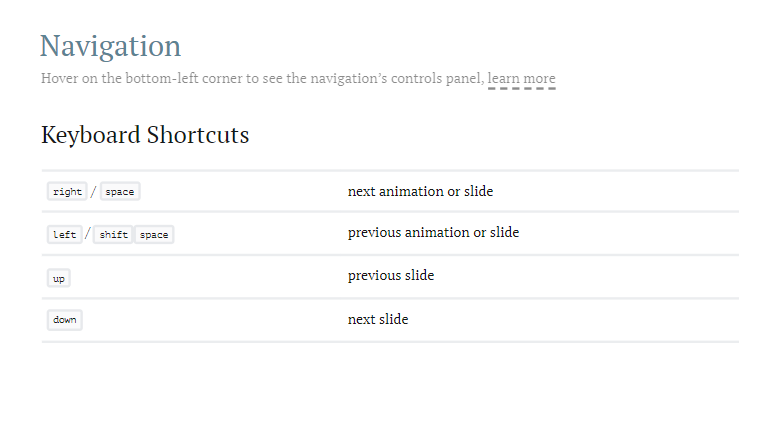
## Keyboard Shortcuts

|     |     |
| --- | --- |
| <kbd>right</kbd> / <kbd>space</kbd>| next animation or slide |
| <kbd>left</kbd>  / <kbd>shift</kbd><kbd>space</kbd> | previous animation or slide |
| <kbd>up</kbd> | previous slide |
| <kbd>down</kbd> | next slide |

<!-- https://sli.dev/guide/animations.html#click-animations -->
<img
v-click
class="absolute -bottom-9 -left-7 w-80 opacity-50"
src="https://sli.dev/assets/arrow-bottom-left.svg"
alt=""
/>
<p v-after class="absolute bottom-23 left-45 opacity-30 transform -rotate-10">Here!</p>
这一张主要是介绍了导航使用。可以使用左右按键切换当前这一张 PPT 的动画效果,使用上下键切换上一张与下一张 PPT。
第五张:Code
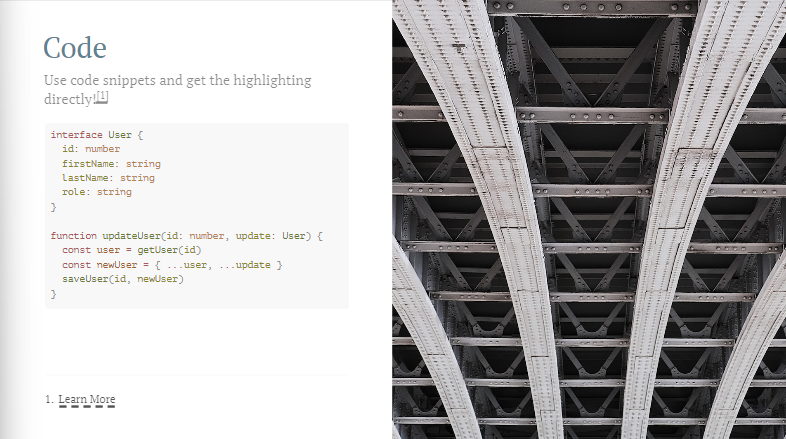
---
layout: image-right
image: https://source.unsplash.com/collection/94734566/1920x1080
---

# Code

Use code snippets and get the highlighting directly![^1]

```ts {all|2|1-6|9|all}
interface User {
  id: number
  firstName: string
  lastName: string
  role: string
}

function updateUser(id: number, update: User) {
  const user = getUser(id)
  const newUser = { ...user, ...update }
  saveUser(id, newUser)
}
```

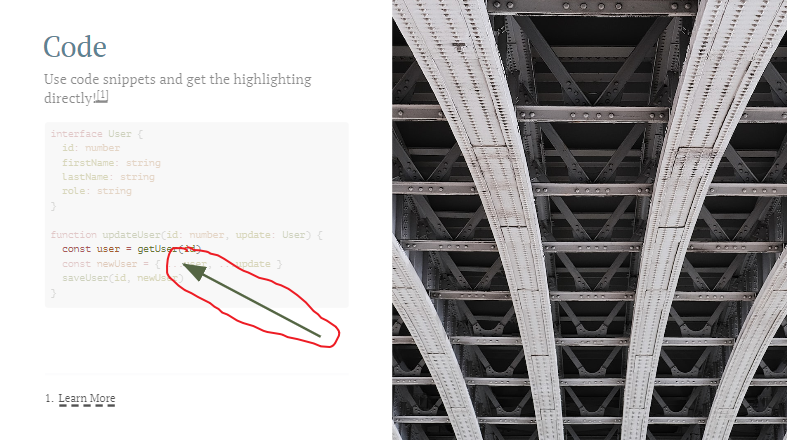
<arrow v-click="[3, 4]" x1="400" y1="420" x2="230" y2="330" color="#564" width="3" arrowSize="1" />

[^1]: [Learn More](https://sli.dev/guide/syntax.html#line-highlighting)

<style>
.footnotes-sep {
  @apply mt-20 opacity-10;
}
.footnotes {
  @apply text-sm opacity-75;
}
.footnote-backref {
  display: none;
}
</style>
第五张使用的是 image-right 布局,并且贴了图片的地址。
在代码中需要注意的是 ts {all|2|1-6|9|all} 这一行,ts 设置代码高亮的语言,大括号里面的是一个动画,先显示所有代码,点击空格之后聚焦显示第二行代码,然后是 1-6 行,后面类似。
<arrow v-click="[3, 4]" x1="400" y1="420" x2="230" y2="330" color="#564" width="3" arrowSize="1"/>显示一个箭头,v-click="[3, 4]" 指定显示在第三次与第四次点击之间,后面的 x、y 是显示箭头的位置,然后还有一些其他属性。
第六张:MDC
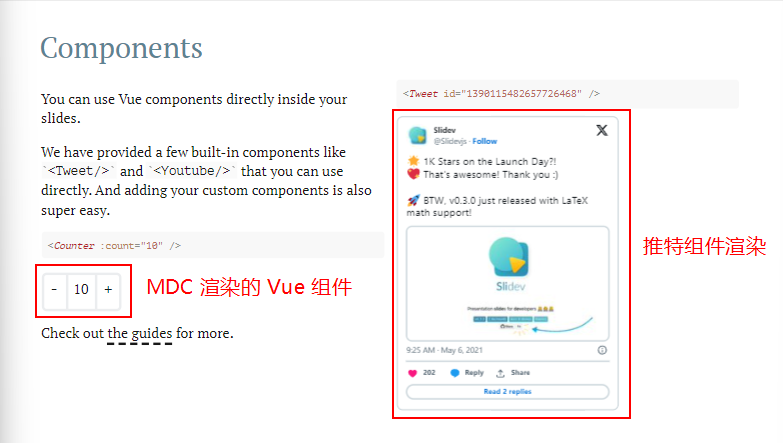
看到这个我只想说 VUE YYDS,slidev 里面内置了推特与油管的组件,给上连接直接在 PPT 内部预览。而自定义的 Counter 组件存放在 components 目录下。
第七张:主题
---
class: px-20
---

# Themes

Slidev comes with powerful theming support. Themes can provide styles, layouts, components, or even configurations for
tools. Switching between themes by just **one edit** in your frontmatter:

<div grid="~ cols-2 gap-2" m="-t-2">

```yaml
---
theme: default
---
```

```yaml
---
theme: seriph
---
```

<img border="rounded" src="https://github.com/slidevjs/themes/blob/main/screenshots/theme-default/01.png?raw=true" alt="">

<img border="rounded" src="https://github.com/slidevjs/themes/blob/main/screenshots/theme-seriph/01.png?raw=true" alt="">

</div>

Read more about [How to use a theme](https://sli.dev/themes/use.html) and
check out the [Awesome Themes Gallery](https://sli.dev/themes/gallery.html).
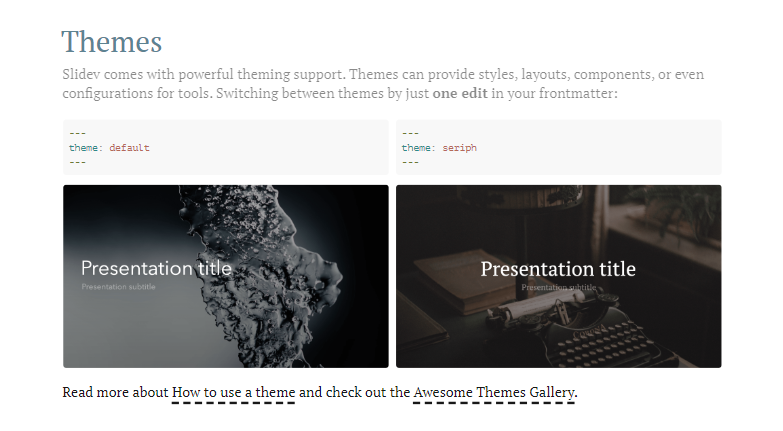
看到第七张,使用 unocss 可以轻松实现两栏布局。其中最重要的代码就是下面这句
<div grid="~ cols-2 gap-2" m="-t-2">- grid :网格布局
- cols-2:分为两栏
- gap-2:两个单位的间距
我又佩服 slidev + unocss 结合一起的强大了。
第八张:动画
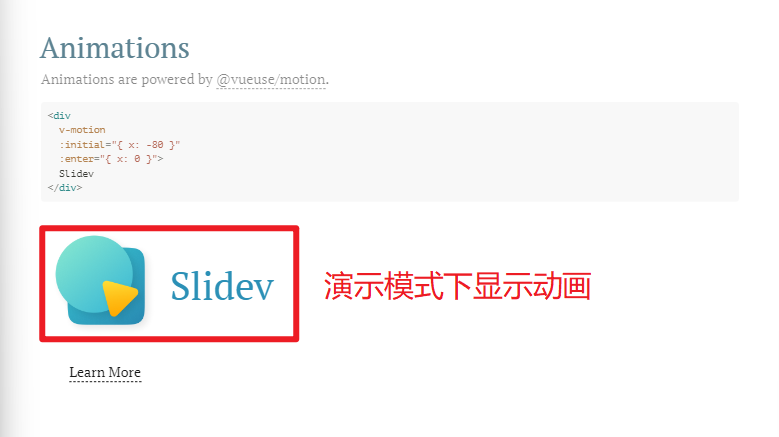
动画主要是使用了 vueuse 进行绘制,并且提供了一个简单的演示。代码比较多,就不贴了。
第九张:LaTeX
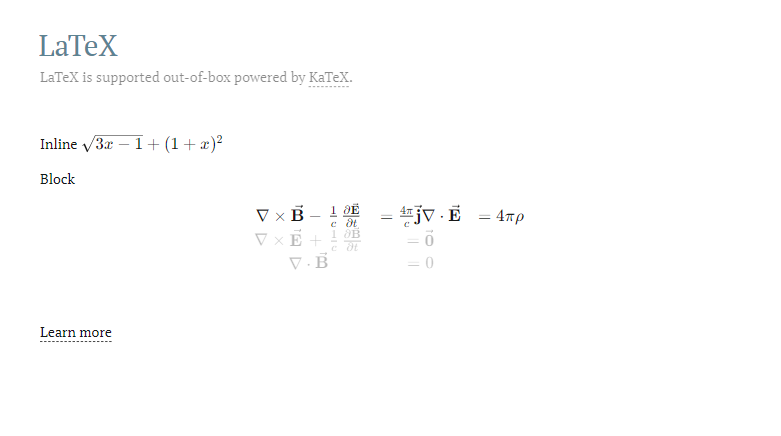
这个支持对数据分析、数据科学相关的人员非常友好。
第十张:Diagrams
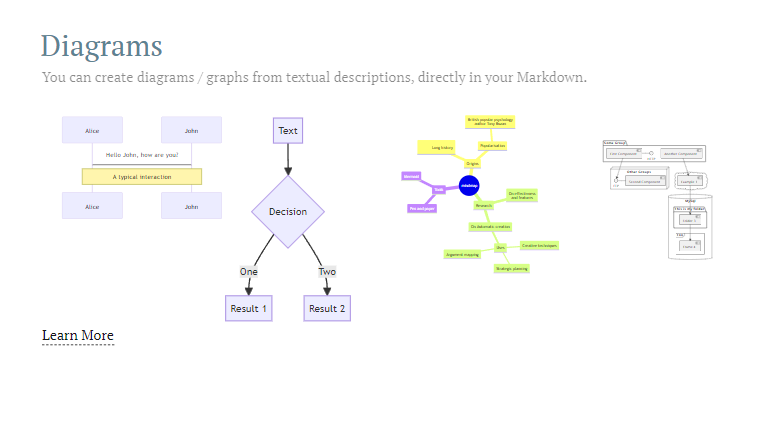
这个功能也非常强大,使用 mermaid 语法绘制流程图、时序图、思维导图,还可以绘制 uml 图。再说一遍,真的强。代码很多就不贴了。
第十一张
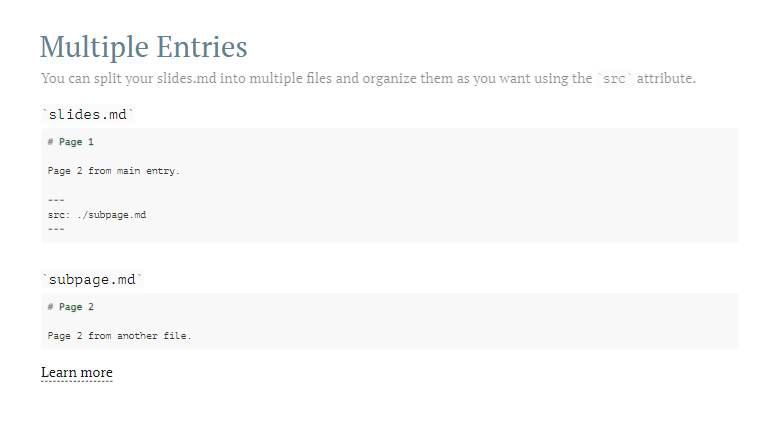
代码如如下:
---
src: ./pages/multiple-entries.md
hide: false
---
这一张图片引用了一个子页面,也就是 ./pages/multiple-entries.md 下的内容,内容如下
# Multiple Entries

You can split your slides.md into multiple files and organize them as you want using the `src` attribute.

#### `slides.md`

```markdown
# Page 1

Page 2 from main entry.

---
src: ./subpage.md
---
```

<br>

#### `subpage.md`

```markdown
# Page 2

Page 2 from another file.
```

[Learn more](https://sli.dev/guide/syntax.html#multiple-entries)
multiple-entries.md 里面的内容就是之前显示的。
总结
整体感觉很不错,我一个不会 PPT 的人也可以做出非常好看的页面。后续还支持导出为 PDF,演讲者模式下还可以录屏。还有很多好用的特性,可以去官网发现。